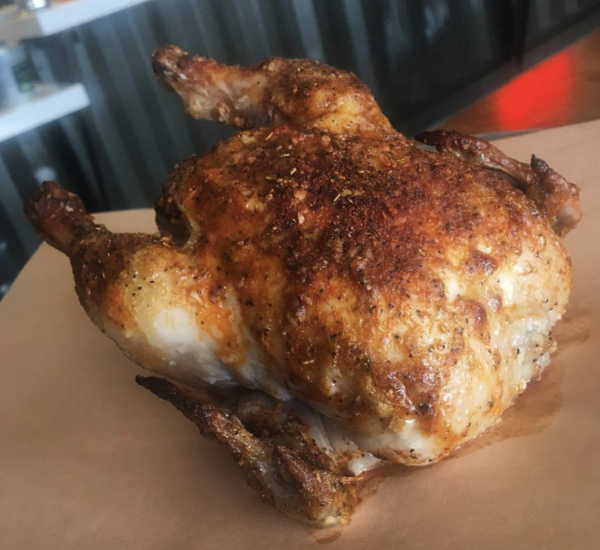
Cooking the perfect holiday turkey can be a daunting experience for most people. It must be juicy, flavorsome, and obviously have crispy skin. Have no fear because we have come up with the only Thanksgiving turkey recipe you will ever need.
Scale
Ingredients
One 11-pound turkey, thawed 6 tablespoons unsalted butter, cut into 1 tablespoon knobs 1 1/2 yellow onions, peeled and halved 4 garlic cloves, peeled
One orange or lemon PERFECT TURKEY Seasoning
A selection of root vegetables of your choice
Instructions
1. Preheat oven to 325 degrees F.
2. Cut the onions and vegetables into similar sizes, around 2x2inches.
3. Use paper towels to dry the skin of the turkey and clean inside the cavity.
4. Slide your (clean) hand between the skin and the breast meat beginning at the cavity opening and slowly separating them into a pocket.
5. Slide three knobs of butter under the breast skin on both sides of the turkey. Try to spread them around evenly.
6. Using the Perfect Turkey spice rub, work the mix into the skin all over the entire bird. Use your hands to press spice rub into the skin and into the cavity. The specially selected ingredients like smoked paprika, salt, garlic, spices, lemon peel, orange peel, red bell pepper, green bell pepper, and sugar will marinate and infuse into the bird’s meat and caramelize for a crispy skin.
7. Stuff the cavity with the onion halves, citrus, and garlic cloves.
8. Move the turkey to a roasting pan with a rack to avoid a soggy bird.
9. Use a large piece of foil, just big enough to fully cover the turkey breast and mold it over the entire breast area. (This will ensure the breasts don’t overcook and become dry)
10. Roast the turkey for 2 hours and then carefully remove the foil from the turkey breasts. Then, increase the temperature to 400 F and cook the bird for another hour. Using an instant-read thermometer, check the internal temperature by getting a reading from the meatiest part of the thigh. The ideal temperature is 165 degrees F. Make sure the skin has crisped up and become a deep golden color.
11. Remove the turkey from the oven (remember it is heavy and hot!) and let it rest for the appropriate time for the weight. Then carve.
Notes
Notes
Serve with your selection of root vegetables and favorite sides. Give thanks and enjoy.
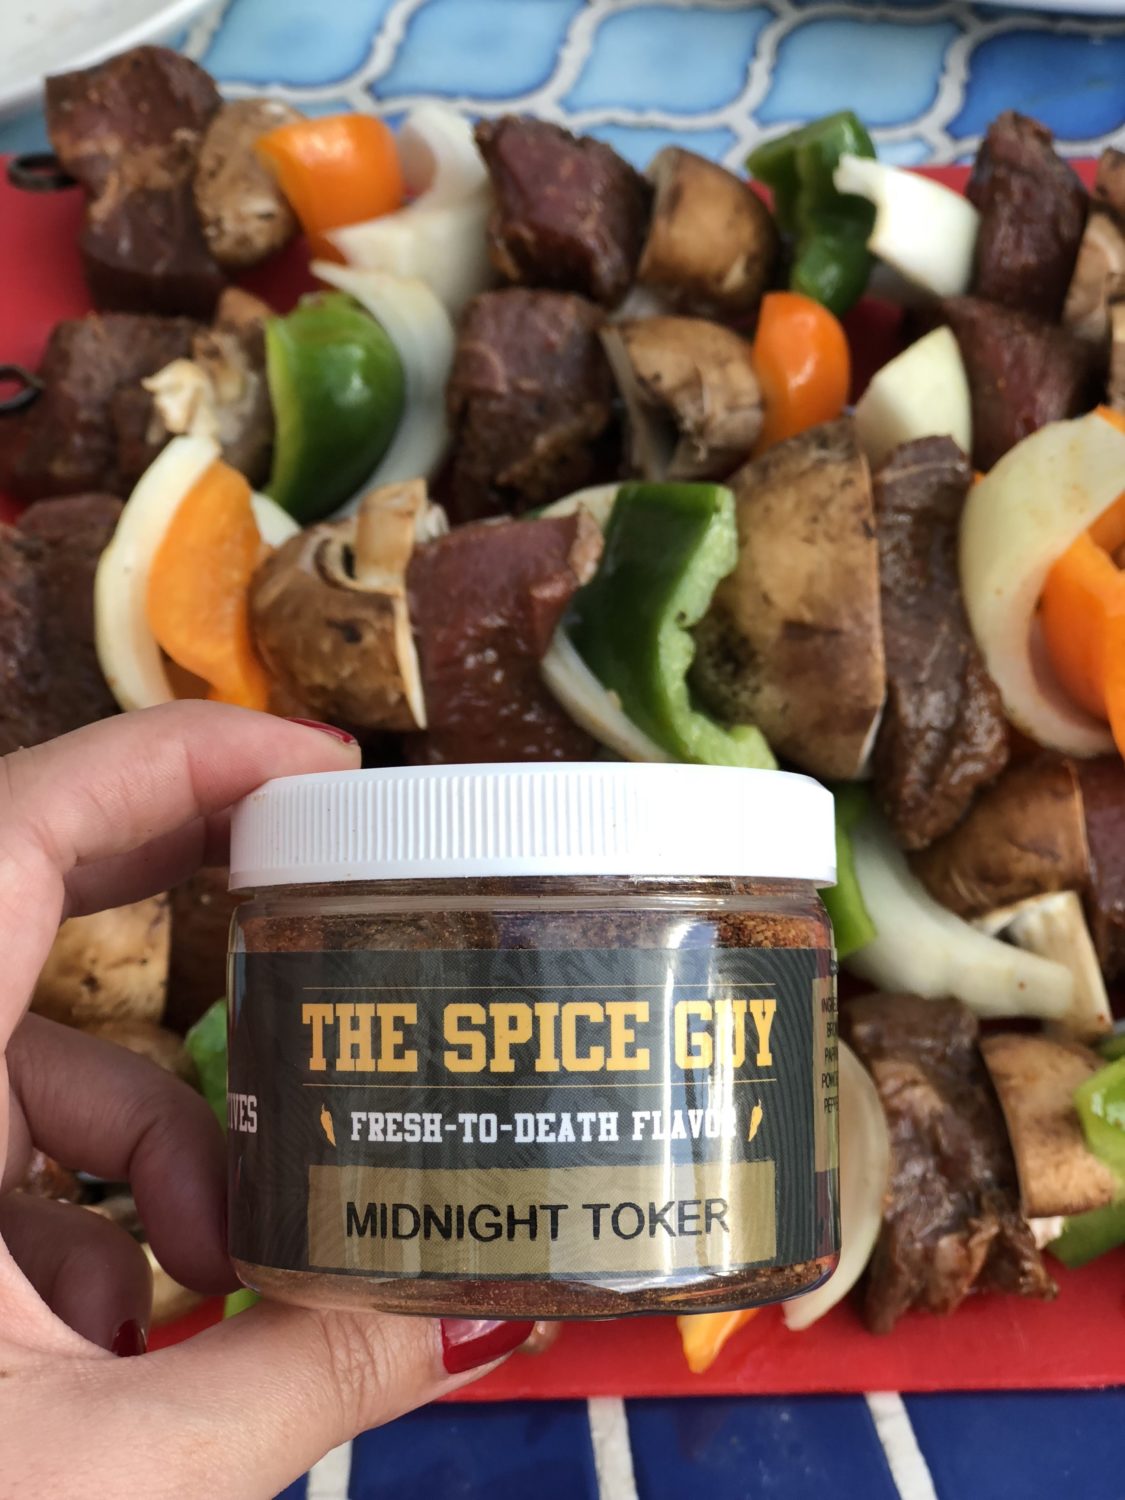
Americans insist on doing things their own way, don’t they?
“Oh, the world uses the metric system? We’ll make our own unit of measurement!”
“Football? Oh, no! We call that soccer. We have our own football.”
“The world spells it ‘kebab?’ We’ll go with ‘kabob.'”
We can’t settle all of these inconsistencies in one day, but we will start with ‘kebab.’ We’re siding with the rest of humanity on this one. K-E-B-A-B.
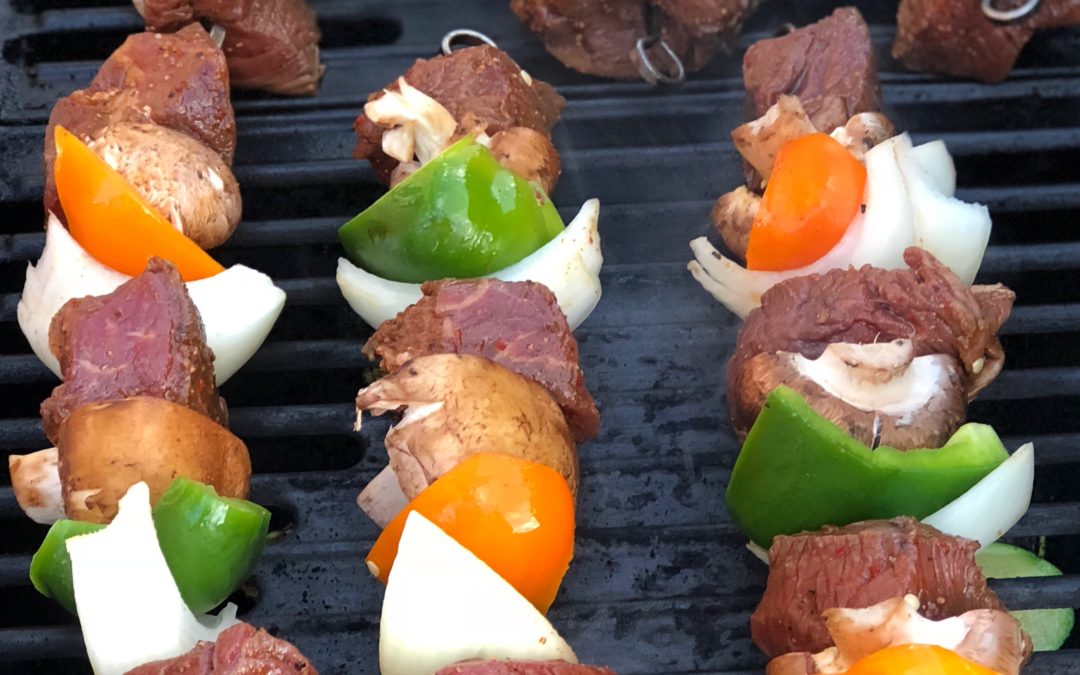
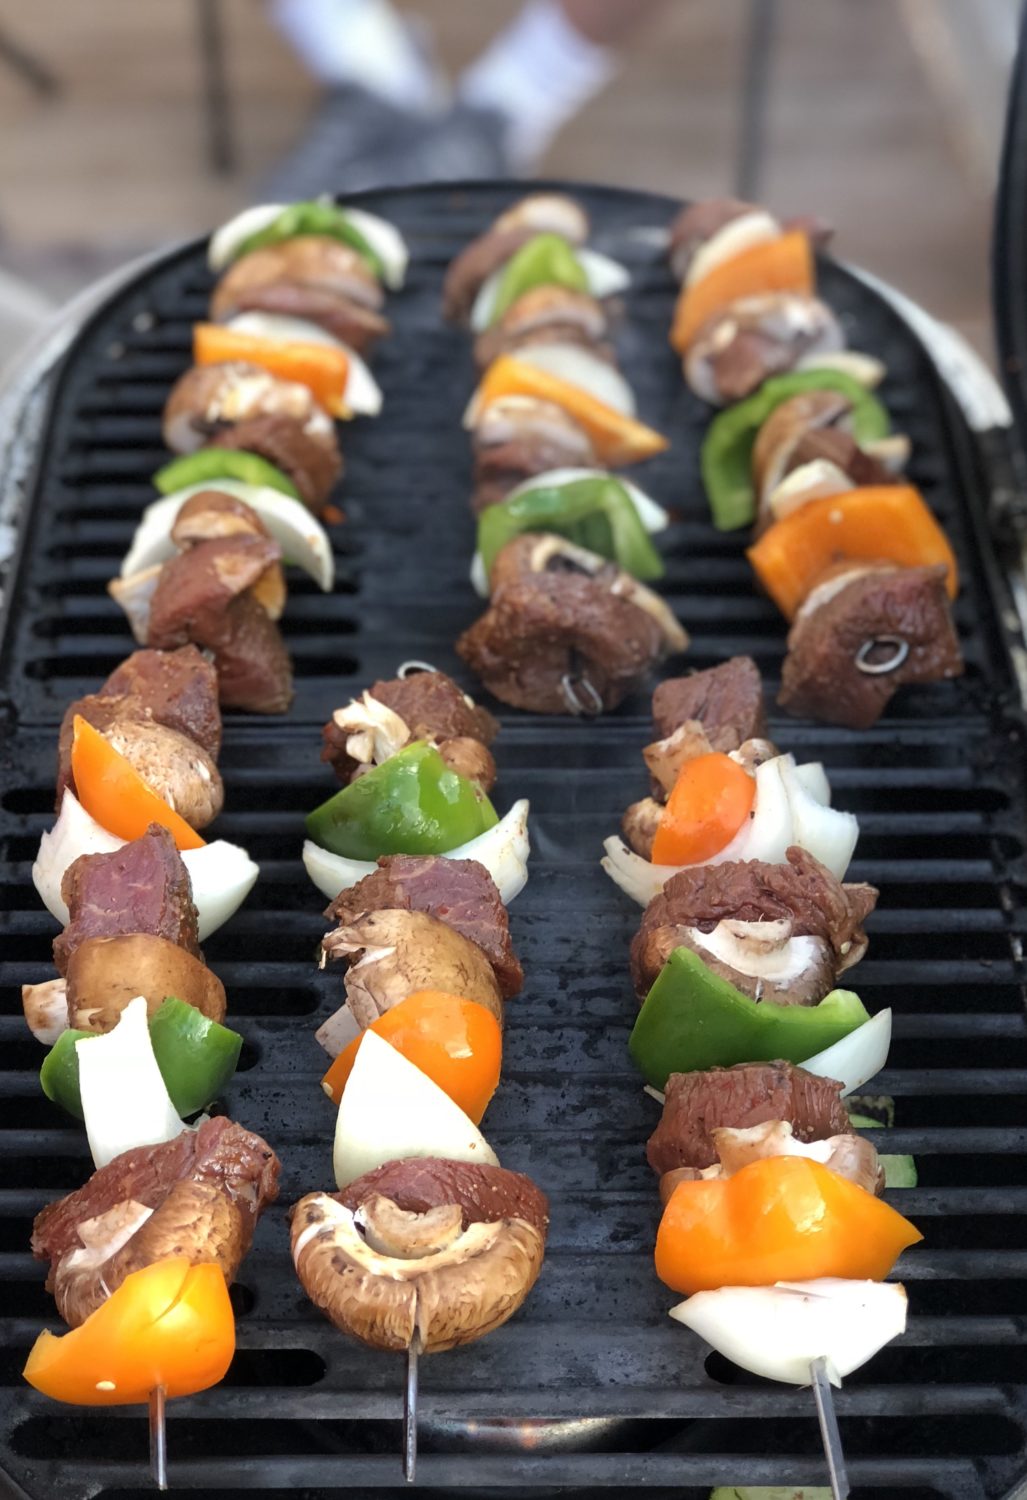
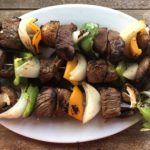
But, no matter how you want to spell it, these steak kebabs were made for our Midnight Toker blend. And they should be on your grill, like, yesterday.
The Midnight Toker blend has been a best-seller with barbecue dudes, grill masters and all around gangsters of love since we started. It includes some badass Syrian import chiles like the Aleppo chile flake — one that has more of a fruit flavor than the heat you’d expect. It’s the perfect blend to blast onto something as simple as kebabs and have the whole crew asking how you became a flavor master overnight.
Feel free to experiment with the meat and veggie combos on this recipe. Not only would it be great with chicken, you could also sub out some interesting vegetables depending on the season. Really, the only non-negotiable here is the Midnight Toker.
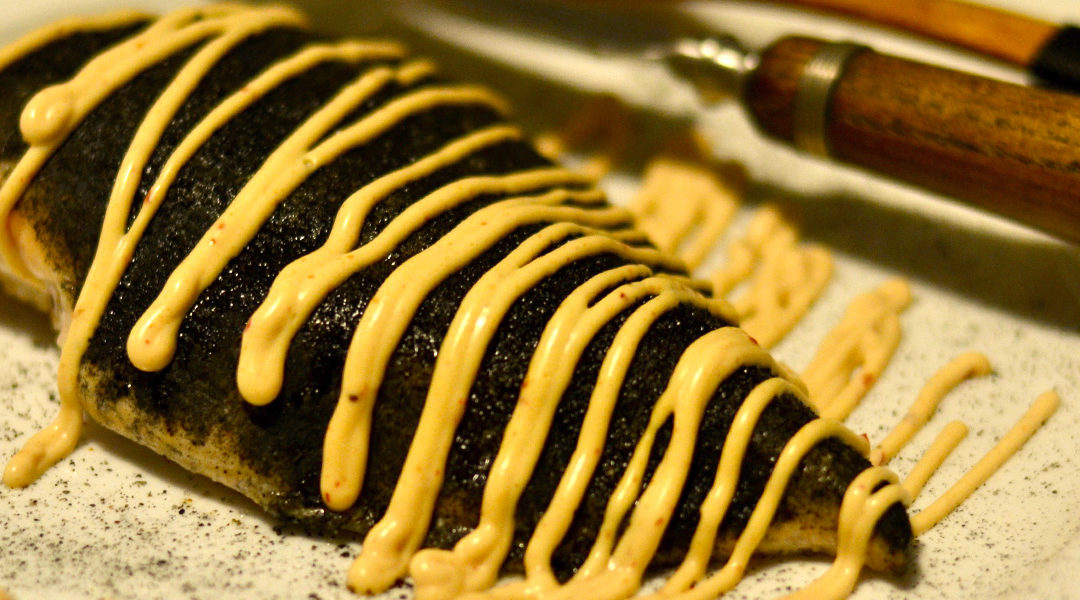
As black as the heart that blends it, Buffalo Bill’s Black Gold makes an excellent looking, and more importantly, excellent tasting chicken breast. We drizzle ours with a chipotle cream sauce that gives a nice heat and a cool contrast look to the dish.
Ingredients
EVOO
Chicken Breast
Buffalo Bills Black Gold
Sour Cream
Mayonnaise
Chipotle In Adobo Sauce
Instructions
Pat Chicken Breast Dry
Drizzle with EVOO
Spice it up with about 1 TBSP of Buffalo Bills Black Gold
Bake at 350 for 20-25, until internal temp reaches 165F.
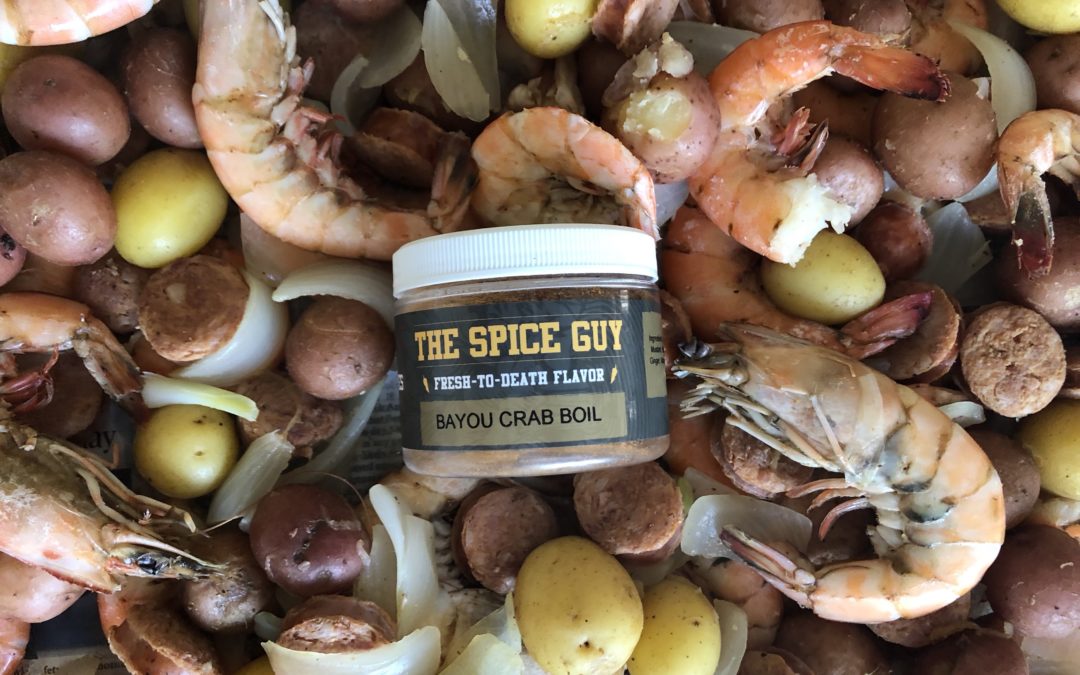
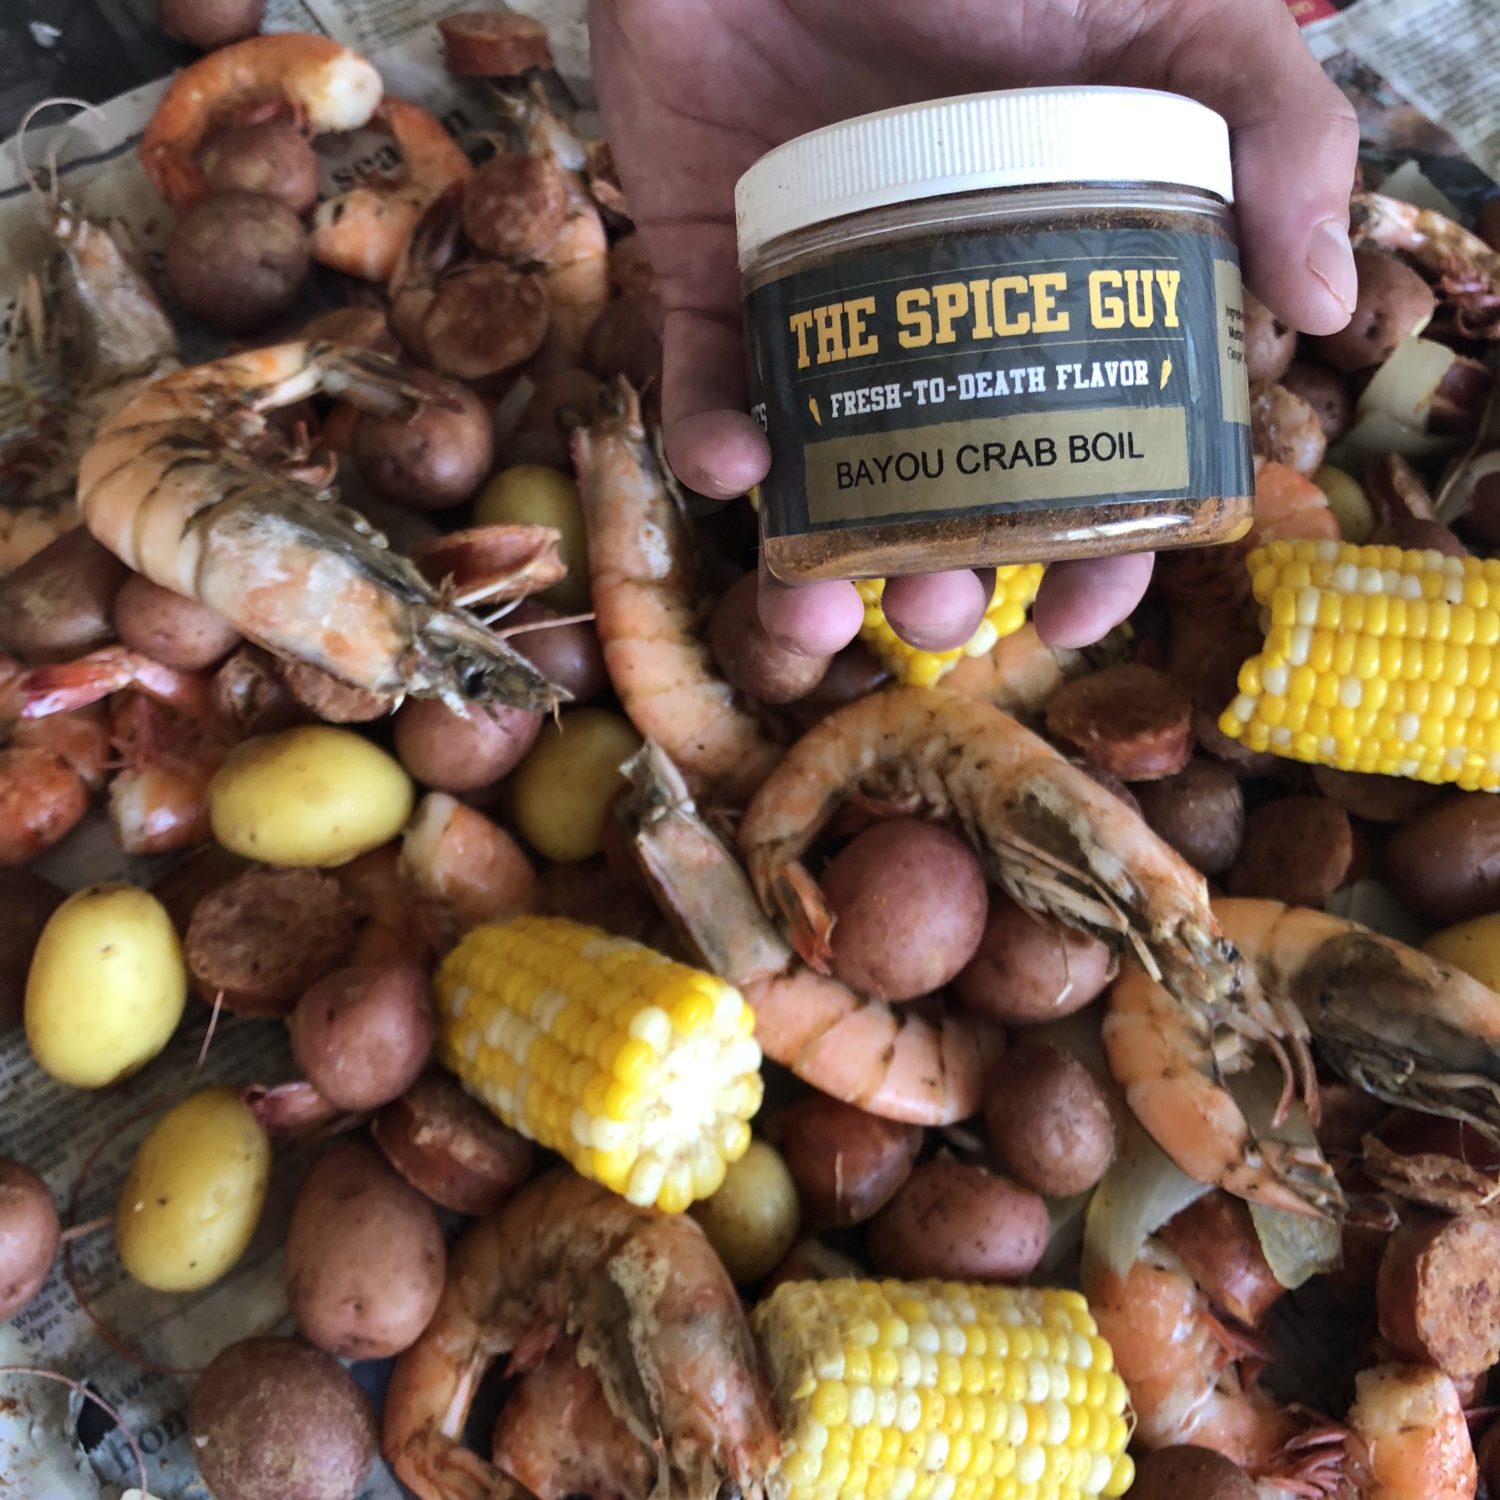
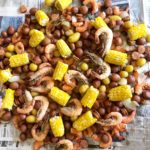
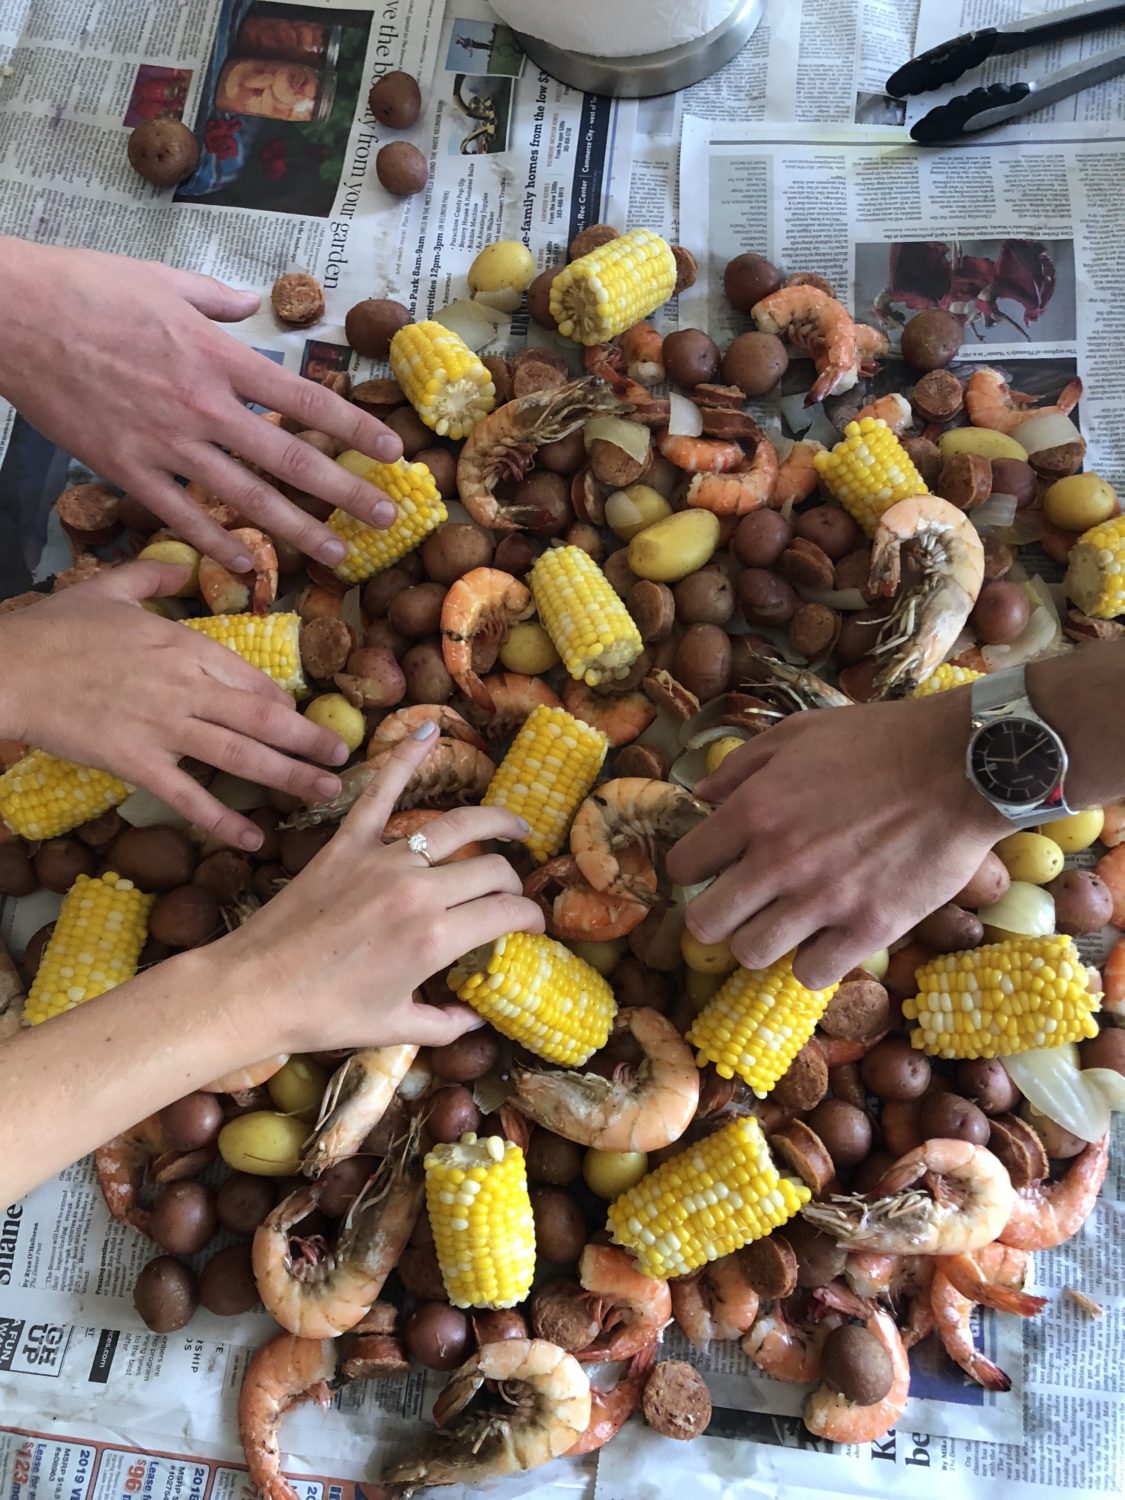
Okay, we’re just going to say it. If you haven’t had a low country boil, you aren’t living. There’s something about eating food with your hands that’s been dumped onto a newspaper-covered table that makes you feel alive.
Let’s have a quick history lesson, shall we? Back in the day, this seafood-laden feast was called “Frogmore Stew,” referencing a small area of South Carolina. But, don’t worry, no frogs here… yet. There’s a lot of debate on the origin of this dish, but most agree that it came from local shrimpers who were making best of what they had to put in a stew for their crew. (Say that five times fast). Similar to a Louisiana-style crawfish boil, this is a blessed mix of boiled shrimp, potatoes, corn, onions and spicy andouille sausage.
The secret ingredient to our low country boil is our Bayou Bay Crab Boil — it’s laced with just enough cayenne to get approval from Forrest Gump and Bubba himself. (RIP)
Optional: cocktail sauce, extra lemon and melted butter
Instructions
Fill large stock pot with 4-6 quarts of water. Add lemon and Bayou Crab Boil blend and bring to a boil.
Add potatoes, return to boil and cook for 5 minutes.
Add sausage and onions, return to boil and cook 5 more minutes.
Add corn, return to boil and cook until potatoes and corn are cooked.
Add shrimp and cook, stirring gently until shrimp turn pink. (About 3 more minutes)
Drain in colander and serve on newspaper with optional sauces — cocktail, melted butter and lemon wedges.
Notes
This recipe is traditionally dumped and served on newspaper and eaten with your hands. Although it’s highly recommended, if you can’t handle it, you can skip it.
Hot weather is ahead, and that means one thing — barbecue season.
Because everyone loved our cook chicken like a champ post, we decided to ring in the most wonderful time of the year (no offense, Christmas) with a post on how to cook pork like a pro. Starting with ribs, because, well… RIBS. You know?
But, if you like this porky post, we’ll keep rolling through different parts of the pig in the upcoming weeks, so let us know.
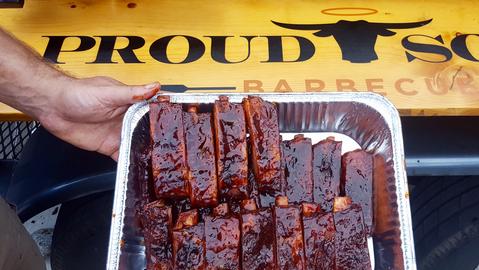
To learn about prepping pork, we consulted with our friends Tony Roberts and Dan Casey over at Proud Souls Barbecue. Not only do they cook amazing ‘cue, the also offer deals on specialty barbecue supplies, cooking classes, catering and more in their shop. You can check out their store for cookers, seasonings & supplies — including a custom blend we worked on together called Soul Swine. They’re located at 2485 N Federal Blvd., Denver. Click here to learn more.
How to Cook Pork Like a Pro — Ribs 101 with Proud Souls BBQ
1. Consider the Cut
“In the store, we prefer to cook spare ribs, preferably St. Louis cut,” Tony and Dan explained. “That’s because there is a higher fat content in spare ribs versus baby back ribs because that cut is closer to the belly of the pig. With more fat content, the ribs have a bigger window of time to be cooked successfully — basically, it’s less likely that you dry them out. Spare ribs are like bacon on a stick.”
Bacon on a stick? That’s poetry right there.
A rack of St. Louis cut spare ribs will typically have 10-12 bones, Tony and Dan estimate having 2-3 bones per person for a party where other items will be served. While you’re in the store, you’ll also need to grab apple juice, aluminum foil, butter and make sure you have your Spice Guy seasonings waiting for you at home.
2. Prep Properly
Once you’re home, unwrap the ribs, pat them dry and grab a knife.
“On the back of every rack is a membrane,” they explained. “We like to peel that off the bone-side because it helps the seasoning penetrate the meat itself. It also yields a better texture at the end. The finished product will be a lot more tender.”
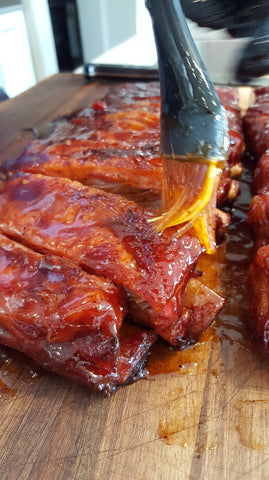
After that, Tony and Dan said there are a lot of directions you can date. You can do a wet marinade (they like apple juice or peach nectar), but to keep things simple and delicious, they suggest going for a dry rub.
If you can’t head over to Proud Souls and buy your own container of Soul Swine, you can DIY it at home with brown sugar, smoked paprika, kosher salt, dark chili powder, ground mustard and cilantro flakes. Apply it liberally to both sides and pop it in the fridge for 30 minutes to an hour.
“It’s important not to leave it in there too long,” they said. “That amount of time helps the ribs ‘sweat’ and absorb the spices, but you don’t want this to go on for too long. It’s important to keep most of the moisture in that meat since it will be cooking for a long time.”
3. Smoke or Bake
Now, while the ribs are marinating in the fridge, prep your oven or smoker. If you don’t have a smoker – the oven works wonderfully! Just preheat that baby to 275 degrees.
Once the oven and ribs are ready, pop them in there uncovered for 2 hours.
When that time is up, remove the ribs from the oven, and take out a big piece of aluminum foil. Curve the foil and add one cup of liquid and a quarter stick of butter. add the ribs on top and wrap in the foil completely. Add it back into the oven for an hour and a half.
“This helps tenderize the meat,” they explained. “You can get really creative with that cup of liquid, though. We like apple juice, but you could use Coca-cola, a beer, peach nectar — anything, really.”
After that time has passed, remove the ribs from the foil and add them to a cookie sheet. If you’re going to add a wet sauce, do it now to the meat-side of the ribs. Or, add another layer of the dry rub. Then, put them back in the oven for 10 minutes to let that set.
Remove from the oven, let rest for five minutes and serve!
Are you going to give this rib recipe a go? If you do, tag us on social media @thespiceguyco — we want to see it!
BBBG adds the smoky grill flavor without having to light one up. But, if you do have one to use, it just doubles the fun for those taste buds.
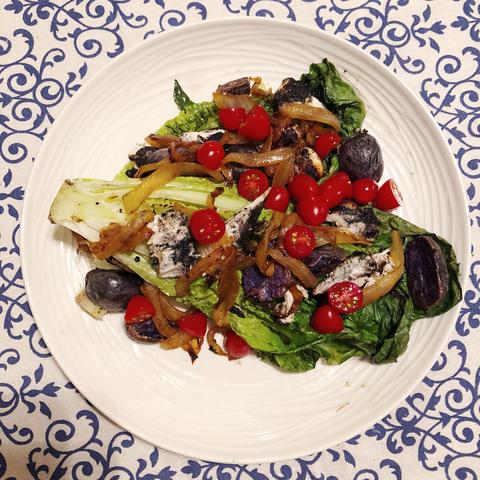
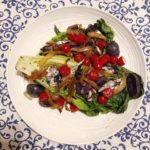
For a simple summer recipe, we smother chicken in the BBBG blend, grill it and add it to a grilled romaine salad and summer produce for a mouthful of summer. Try this one out, and we promise you’ll never look at romaine lettuce the same way again.
2 cups of small potatoes, softened (we used purple)
Olive oil
Salt & Pepper
Salad dressing of your choice (we used blue cheese)
Instructions
Prep all veggies. Slice onion into long strips, wash and halve cherry tomatoes, wash and halve romaine lettuce lengthwise, scrub potatoes.
Trim and pat chicken breast dry. Cover in Buffalo Bill’s Black Gold seasoning, set aside.
Preheat grill or grill pan — see recipe notes below.
Preheat large skillet to medium heat on the stove.
Add olive oil or butter to skillet and caramelize onions for 20-40 minutes, stirring every few minutes, but allowing onions to char. The longer the better.
While onions are cooking, prepare potatoes using your preferred method — you can roast, boil or microwave. We boiled, cut in half and added to onions for the last 10 minutes to crisp.
Add seasoned chicken to grill and grill for 10 to 15 minutes per side, or until no longer pink and juices run clear. Set aside.
Brush cut side of romaine halves with olive oil, sprinkle with salt and pepper and grill until charred, for 2-4 minutes, checking often. They burn fast!
Assemble salad and serve.
Notes
If you don’t have a grill, the chicken is great in a skillet too. The Buffalo Bill’s Black Gold will give you the charred, grill taste regardless.
Make the recipe your own — switch up the vegetables, try different dressing, try a different protein, add fruit (grilled peaches, anyone?), etc.
I'm Zach. In 2013, I started selling spices to restaurants in Colorado. Today, THE SPICE GUY is growing faster than I could have imagined. This blog is where our team shares recipes, tips, interviews with influential food folks and more.